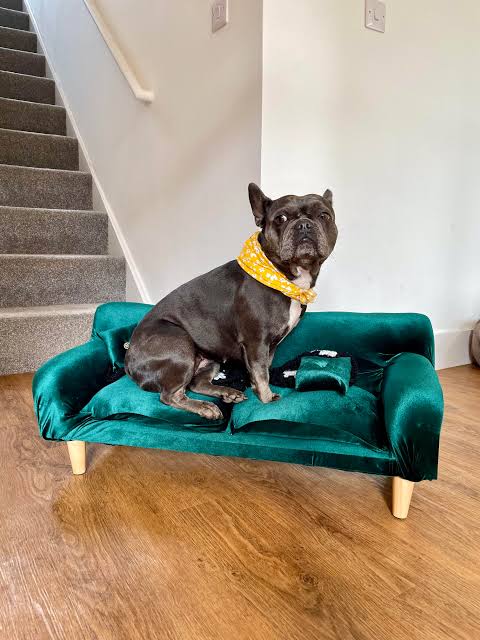
A lot of people buy pet furniture based on hype. But think about it. What are you really paying for? Brand name, not materials. And here’s where you should pause. If you’re spending fifty thousand naira on a cat tree made from particleboard wrapped in cheap fabric, is that really better than making one from strong wood you finish yourself?
DIY lets you
• Match your home decor easily
• Adjust height, size, and features to fit your pet’s personality
• Fix problems like wobbling or tearing without replacing the whole thing
• Spend way less while getting way more durability
So the big question isn’t “can I DIY?” It’s “why haven’t I started?”
1. DIY Wooden Pet Bed
This one is simple and ridiculously budget friendly.
What you need
• Pallet wood or leftover planks
• Screws
• Sandpaper
• Cushion or old foam
• Paint or varnish
Steps
-
Cut the pallet wood to your preferred size
-
Assemble four sides to form a frame
-
Add a base support using extra planks
-
Sand everything till it’s smooth
-
Paint or varnish
-
Throw in a cushion
Why it works
It’s sturdier than many store-bought beds. And if you think pallets are “too rough,” that’s an assumption worth testing. Once sanded, they look clean and premium. Plus, you can customize the height if your pet is older or has mobility issues.
Question for you: have you been defaulting to store-bought beds thinking they look better? Because DIY wood pieces can easily look classy if you give them a clean finish.
2. Rope Scratching Post (Perfect for Cats)
People often assume scratching posts need to be fancy. Truth is, cats don’t care about aesthetics. They care about grip, height, and stability.
What you need
• Old table leg or wooden pole
• Thick sisal rope
• Hot glue
• A flat wooden base
Steps
-
Attach the pole to the base
-
Wrap sisal rope tightly from bottom to top
-
Secure with glue at intervals
-
Add a small toy at the top
Why it works
Cats love texture. You’re giving them exactly what they want without paying for branding. The only place folks mess up is height. If the pole is too short, they won’t use it. Aim for something taller than your cat’s full stretch.
Let me question you for a sec. Do you design furniture based on what looks neat or based on how your pet behaves? That gap affects whether they actually use it.
3. PVC Pipe Pet Bed (Lightweight and Modern)
PVC pipes are cheap, durable, and surprisingly stylish when you assemble them right. But people underestimate them because they think pipes equal “industrial look.” Not really. It depends on the finish.
What you need
• PVC pipes
• Elbow connectors
• Nylon mesh or strong fabric
• Scissors
Steps
-
Form a rectangular frame
-
Build four legs using connector pieces
-
Stretch the mesh tightly
-
Secure the fabric around the pipe frame
Why it works
It stays cool for pets during hot weather, especially in Nigeria where heat can be a real issue. The raised design helps airflow. And PVC doesn’t collect odor like wood or fabric beds.
What angle are you missing here? Many people overlook how heat affects pet comfort. This type of bed solves that for almost nothing.
4. DIY Cat Window Perch
Cats love height and sun. Instead of buying a window perch, build one with stuff lying around.
What you need
• Strong shelf board
• L brackets
• Foam
• Fabric
Steps
-
Measure your window area
-
Fix the shelf with L brackets
-
Add foam and wrap with fabric
-
Make sure the brackets hold at least double your cat’s weight
Why it works
Cats want a view. Store-bought perches often break because the weight rating is questionable. Here, you control the strength yourself.
But think about this. Have you assumed your walls can’t hold brackets? Most walls actually can. It’s more about using the right screws.
5. Old Suitcase Pet Bed
This one is aesthetic and insanely cheap.
You need
• An old suitcase
• Foam
• Fabric
• Small wooden legs
Steps
-
Remove the top or secure it open
-
Add foam and cover with fabric
-
Attach short legs under the case
-
Decorate
Why it works
It’s cozy, enclosed, and stylish. Perfect for pets that love feeling tucked in. And you avoid wasting an old suitcase.
The only thing to watch is suitability. Some dogs hate enclosed spaces. Don’t assume every pet will love it just because it looks cute online.
6. DIY Pet Ramp
Older pets need help climbing onto sofas or beds.
You need
• Plywood
• Hinges
• Carpet or textured mat
Steps
-
Cut plywood at an angle
-
Secure with hinges
-
Cover the surface with carpet
-
Test the stability
Why it works
Pet ramps online are shockingly expensive. Making your own is more durable and safer since you choose the incline. A lot of people assume ramps must look perfect. The real priority is traction, not beauty.
Are you thinking function first or aesthetics first? That matters.
Common Mistakes People Make
Here are some traps you should avoid.
• Over decorating before checking stability
• Using low quality screws
• Ignoring weight capacity
• Choosing fabrics pets easily tear
• Forgetting to test edges for sharpness
Sometimes people judge DIY projects by looks alone, forgetting that pets judge by comfort and usability.
What Should You Watch Out For
• Toxic glues or paints
• Weak base structures
• Too much fabric on beds for pets that chew
• Furniture that traps heat
• Items placed in unstable areas
Your pet will test furniture harder than you expect. Always assume they will scratch, chew, jump, and push it.
Final Thought
DIY pet furniture is honestly one of the easiest ways to upgrade your home without overspending. You get functional pieces that fit your lifestyle, plus your pets get something made with intention. And the beautiful part? You don’t need to be a pro.
But let me throw this back to you.
Which area do you struggle with more when it comes to pet furniture, design or durability? And what’s one piece you’re thinking of building first?


